
I’ve been podcasting for about 18 months now [update June 2023: 3 years podcasting!], and spend about 25 hours per week on video meetings and presentations. While I still have room to improve, I have identified several easy and simple ways to improve audio quality.
I’ve arranged this post to give as much information as quickly as possible, so even if you only have 2 minutes, you’ll get a few actionable take-aways. And if you keep reading, you’ll learn more subtle tips and the reasons why they work.
If You Do Nothing Else
If you do nothing else, DO THIS:
- Use headphones (wired preferable).
- Do not use wireless microphones.
- Turn off or remove anything that might create background noise – phones, fans, clocks, etc.
- Always double check your settings to ensure that you are using the microphone you think you are.
- Temporarily add a few soft surfaces to your room to reduce reflections/reverb (pillows, sofa cushions, etc) – details in the next section
Headphones will prevent the audio you are hearing from feeding-back into your microphone. This feedback can result in distracting echo, or worse. A dedicated microphone will usually pick up less background noise unless it is a condenser microphone (more on this below).
Wireless microphones are almost always unacceptable. Most personal wireless mics use bluetooth, which is not nearly as reliable as wired systems. Also, many bluetooth microphones compress your audio to fit into the bluetooth wireless protocol bandwidth, making your audio sound worse. Most modern laptops have pretty good built-in microphones, and almost always do better than wireless headsets or wireless microphones. But read on to learn about dramatically better microphones that cost less than $100.
As for other noises, our brains are phenomenal at filtering background noises, but your microphone is not so forgiving. The tick-tock of a clock suddenly becomes reminiscent of an Edgar Allan Poe short story. The notification from a mobile device is startling. That seemingly quiet unscrewing of a metal water container takes over the audio. Spend time removing these sources of noises.

Choosing and Treating a Location to Record
- Pick a location with a lot of soft and uneven surfaces.
- If possible, add MORE soft surfaces.
For many of us, there isn’t much of a choice on where to attend your recording session. But if you have a choice, pick a location with a lot of soft surfaces. This is needed to reduce reverb and echo.
Sound is amazingly good at reflecting. And our brains are amazingly good at filtering these echoes in real life. But just like with background noises, when listening to recordings our brains don’t get the same environmental signals that we get when we’re actually in the room. As a result these echoes become more distracting in recorded audio.
As an example, think about a kitchen or bathroom that you’ve been in where every surface is hard tile, granite, metal, etc. Even then our brains struggle to filter the echo. When recording at home, your voice reflecting off of your monitor back into your microphone may cause enough reverb to be distracting to a listener! We’ll discuss how to reduce that later.
For now, just try to pick a location that has soft surfaces, such as curtains covering the windows, cloth furniture. Even bookcases filled with books are pretty good, since it creates a lot of uneven surfaces to disperse soundwaves.
Many professionals, when COVID hit, started recording from their closets when they no longer had recording studio access. Hanging clothing proved to be a good sound treatment, and some people have taken this to the next level, hanging curtains or blankets on the walls of the room they record in.
In a pinch, put pillows in your room corners, and perhaps bring in a chair or two and drape them with blankets.
In the “more tips” section below I discuss additional acoustic treatments.
Noise and Echo Reduction Technologies – Far From Perfect
- It is always better to eliminate/minimize noises in the first place, rather than rely on noise and echo reduction technologies.
You may have noticed that many apps and devices have noise cancellation and echo cancellation technologies. Most of them work to some extent (i.e. Zoom, Google Meet, or AirPods), but they do have notable limitations and trade-offs. Do not expect miracles. In fact, it is sometimes better to not use these technologies when you are recording or presenting important work. If you follow the suggestions in this guide, you can turn these features off.
Most noise and echo reduction technologies degrade audio quality, and as noise increases, audio quality decreases.
The reason that these technologies degrade audio is because very often they simply remove entire frequency ranges from the audio – those ranges that are interpreted as echo or noise. This means those same frequencies are removed from the non-noise and non-echo audio, leaving that audio garbled, muffled, and often unintelligible.
The flakiest noise reduction, in my experience, has been Apple AirPod microphone noise reduction. When there is any noise that I’d consider moderate or higher, the noise reduction algorithm seriously degrades the voice quality, making it muffled and choppy. Now, yes, it does work for some types of noise, but I’ve had multiple instances where audio quality is actually improved by using something other than AirPods as a microphone.
But I Have an Expensive/Good Microphone!
That’s great! The problem is, much of the time these mics aren’t used properly – especially those that are a style called “condenser microphones” (more on that in the very next section).
I see lots of people with quality microphones like the $70 Samson Q2U, which is possibly the best value USB vocal microphone available today, the popular Blue Yeti or $60 Blue Snowball, the old reliable can’t-go-wrong and nearly indestructible $90 Shure SM58, or even high-end mics like the Shure SM-7B. An improperly used high quality mic will sound worse than a built-in microphone on a laptop, so make sure you are using the mic properly with good technique. Read-on for details.
An improperly used high quality mic will sound worse than a built-in microphone on a laptop
Here are my quick-start tips for quality microphones:
- Use a windscreen or a pop filter, even if indoors. My preference is a windscreen – it’s cheaper, takes less space. But doesn’t “look as cool”. But this is audio, so I don’t care.
- Understand if your microphone is Dynamic or a Condenser. If you are buying a microphone for general purpose use at home, I recommend a Dynamic mic like the $70 Samson Q2U. A Condenser mic requires much more care (see next section).

If You Have a Condenser Mic
Condenser mics are “active” mics that are powered. They generally have more gain (ability to pick up quieter noises, and thus sounds from farther away). They tend to have better frequency response (accuracy) across the audio spectrum, which is a good thing if you require high accuracy (such as singers or musicians). But that frequency accuracy doesn’t matter if you can’t control echo and background noise, which is HARD to do in a home or travel environment.
Condenser mics are less durable than dynamic mics, so they don’t travel well.
- If you have a Condenser Mic, be aware that it will pick up much more background sounds. Sound treatment of your room is MUCH more important when using a condenser microphone.
- Place a condenser microphone 6-12″ (15-30 cm) away from your mouth. This close placement allows you to reduce the mic “gain” (amplification) accordingly to help reduce background noise. If you are talking to your condenser mic from further away, your gain will need to be set too high, and everything will sound worse.
If You Have a Dynamic Mic
Dynamic microphones do not require external power. Thus, they don’t pick up quiet sounds as well. This makes them ideal for home environments where there may be background noises (like a neighbor’s leaf blower, the washing machine clunking, or your HVAC air blowing). They are usually quite durable microphones that travel well.
- Dynamic mics must be placed close to the mouth – 2-6″ (5-15 cm) away. This might feel uncomfortably close at first, but this is needed for the best frequency response. This might require getting a mic stand or boom arm – see the next section.
- Place the microphone at an angle to your mouth (45 degrees, pointing towards the corner of your mouth). In other words, don’t talk directly into the mic, otherwise you’ll get more “plosive” sounds from “p’s” and “d’s” that sound like a jarring “thump” to the listener. See also: get a windscreen or pop filter.
Reducing Vibrations
If your mic is on a stand on your desk, it will be susceptible to thumps and bumps if you touch your desk. Even moving a mouse can be picked up as low-frequency vibrations (especially with a condenser mic, but even with a dynamic mic). Of course, you can just accept this, and be very careful not to touch anything while recording. Or some of this may be perfectly acceptable for video conferences or informal presentations. But if you want higher quality, you’ll want to consider the following:
- Mount you microphone using a shock mount. This reduces vibrations.
- Use a Boom Arm rather than a mic stand, attached to a spot that won’t be bumped, and use a shock mount.
- If you are using a mic stand and you don’t want or can’t afford the above options, you may try placing a piece of foam or a few layers of soft cloth under your mic stand to dampen vibrations. This won’t eliminate them, but will reduce them a few dB.
A shock mount is a pretty cool piece of engineering – simple, inexpensive, and effective. Note that some microphones, like the Shure SM58, have a basic built-in shock mount that helps, but the compromise of a small built-in shock mount means it often is not enough, and you may need a mountable shock mount anyway.
A boom arm requires some commitment because it takes up space. However, it allows you to get optimal mic placement (see above for distance from mouth requirements), and it allows you to isolate vibrations. Many (most?) boom arms come with a shock mount as well.
More Tips
The above tips will probably get you most of what you are looking for. But what if you still need more? Here are a few extra tips for particularly challenging rooms.
Rooms With Poor Acoustics
As mentioned above, rooms with soft uneven surfaces are best to reduce echo and reverb. But what if you don’t have that option?
- Use a dynamic mic. As mentioned above, a properly used dynamic mic will pick up less background noises.
- Reduce mic gain and speak very closely to the microphone. If you are using a laptop, this might mean placing the laptop higher so it is level with your mouth. As for gain adjustments, there are many tutorials online, and each computer operating system or recording device has different methods, so I’ll leave this to you to research.
- Improve sound treatment. Hang up some blankets or curtains on the walls. Throw a few pillows in the room (pillows in the corners of the room often provide the most improvement). Or make a pillow fort around your recording area, like NPR reporters do. Get creative. If you want to have a permanent, more attractive look, consider buying acoustic panels (some are quite attractive) or hanging some tapestries or other cloth art.
Regarding Acoustic Panels – Know Before You Buy
Acoustic panels will NOT sound-proof a room. i.e. they won’t reduce the amount of sound infiltration from other rooms or outdoors. They will reduce reflections (echo and reverb), which as mentioned above, become very annoying in recordings or on real-time video stream/calls.
Also be aware that in most experiences, people need many more acoustic panels than they realize. I know many people who started off buying a few, realized it wasn’t enough, and then proceeded down a slippery slope.
Acoustic panels can be very cheap, such as compressible foam “egg crate” style, moderately expensive cloth panels (such as this style that I use), or very expensive art panels.
You’ll want to treat all of the walls in your room – front, sides, and rear. You may even want to treat the ceiling if you have very high quality requirements and/or a condenser mic. By “treat”, I don’t mean covering every square inch. But the bare minimum would be walls that are in the direct line-of-travel of the sound you want to dampen.
Alternatively, you can purchase or make (using those “egg crate” style panels) a sound box that envelopes the microphone on the sides, rear, and top. This will reduce reflection from everywhere but behind you, but may not be sufficient for rooms with poor acoustics.
Sound Reflecting Off Your Computer Monitor
This can often be fixed with better mic placement. Imagine the words coming out of your mouth are visible, and transmit in a straight line (actually, they disperse, but the strongest vocalizations project in a straight line). They then reflect off anything in their path. Think geometrically…what angle do they reflect off the monitor? Is it back towards your microphone? If so, move your microphone and change your orientation until that direct line is NOT back towards your mic. Maybe even angle or tilt your monitor a bit to redirect the reflection.
Alternatively, you can purchase or make (using those “egg crate” style panels) a sound box that envelopes the microphone on the sides, rear, and top. This will reduce reflection from everywhere but behind you.
If Recording Outside
When outdoors, wind becomes a big problem. But hey, at least sound reflections shouldn’t be a problem!
If you are outside, you might be using a more complex mic system, like a lav system, to allow for mobility and hands-free. I use the DJI 2 mic lav wireless system, which allows for backup recording without relying on wireless protocols. But there are plenty of other options that are beyond the scope of this article.
For now, I’m going to assume handheld mics, and the goal being to interview someone with minimal background pick-up (read on if you want ambient sounds). Again, in this circumstance a dynamic mic is better (more durable, less background noise, no power required).
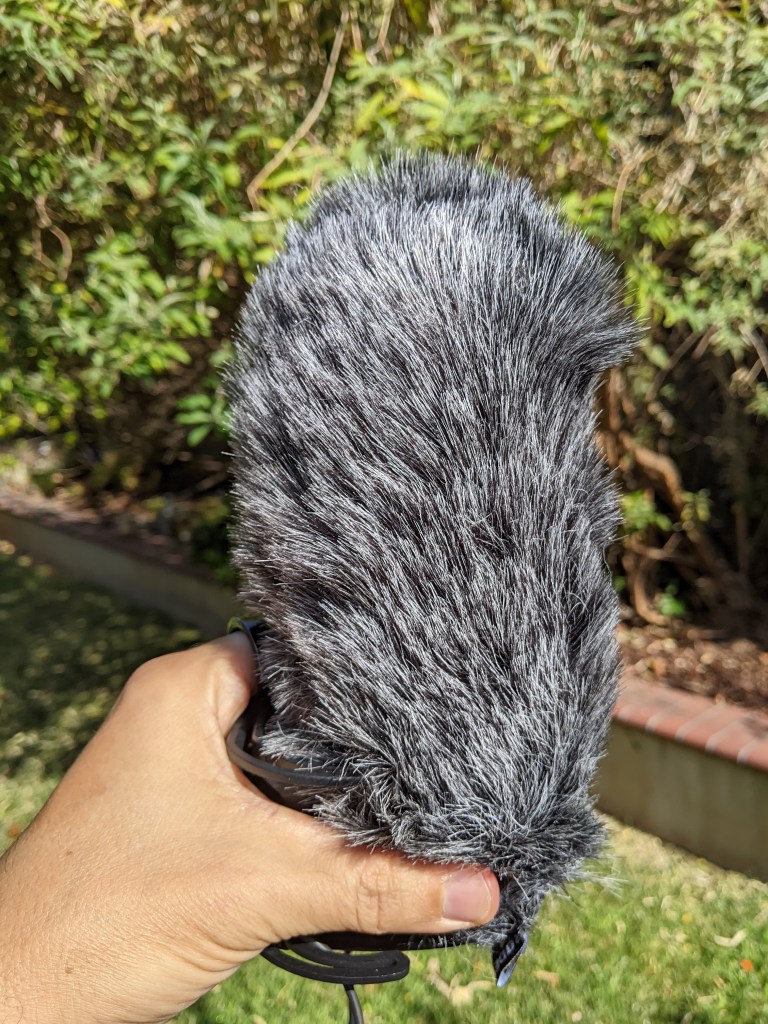
Of course, a traditional foam wind screen helps, but usually it is not enough. You can upgrade to “furry” wind screens, which is sometimes called a “dead cat” or a “dead rat”. You might wonder “why not use this all the time to reduce ‘plosives’? Well, the trade off is that audio accuracy/frequency response is degraded slightly.
You might want a specialized outdoor mic, like the Rode Reporter Mic. I haven’t used this mic myself, but it is what I plan to buy next, based partly on this review showing just how well it handles wind. This is accomplished by changing the frequency response of the microphone to largely eliminate the frequencies that wind noise generate. But the trade-off is that other sounds in those frequency ranges will also be reduced.
If you are recording outdoors and want ambient sounds, you might want to use a separate microphone just for ambient sound pickup. This will allow you full control of those ambient sounds in a separate audio track. It’s what I do, but again, the details are beyond the scope of this article.
What Tips Do You Have?
What has worked for you? Any other suggestions? Please leave a comment!
